This year we worked on a patio project that was nestled in the heart of Chambersburg. In fact, it was so tucked away that if you were walking on the sidewalk out front, you wouldn’t even know the outdoor living space was there.
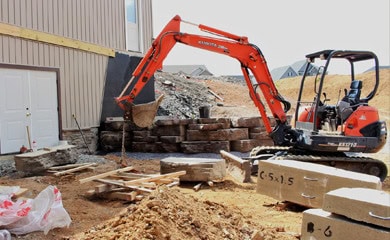
At one point, our Operations Manager questioned how we were going to fit our mini excavator in the construction zone. But, after careful planning, our crew was confident they could make the machinery fit and keep the project on time.


Here’s what each phase of The Hideaway House project looked like:
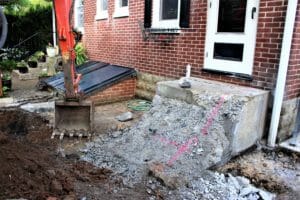
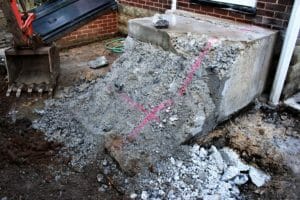
Phase 1 – DEMO DAY! The owner had a set of solid limestone and concrete steps coming from the back of house into the future patio space. These generic steps needed to be removed, but boy! Where they stubborn.
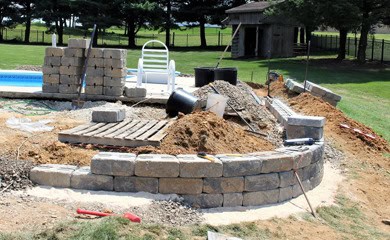
Phase 2 – LEVEL THE PATIO AREA. To ensure no cracks or settling, it’s imperative to first, level the surface of the ground and second, lay a geotextile fabric to create a barrier between the soil and the packing stone which will be placed on top. If you prepare a strong foundation, the pavers will remain in place for years to come.
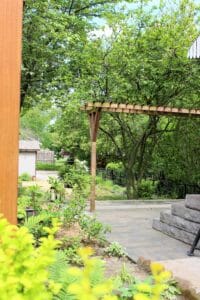
Phase 3 – INSTALL THE PERGOLA. This centerpiece was erected before the pavers were installed so that it could be anchored in the ground and flush against the pattern of the paver.
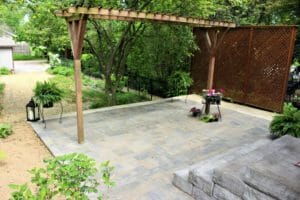
Phase 4 – LAY THE PAVERS. Choosing a complimentary pattern and color paver has as much impact on the space as the actual square footage. When all is said and done, your outdoor living space should be a well-planned, well-loved, enduring investment.
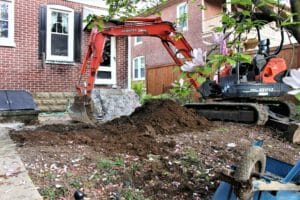
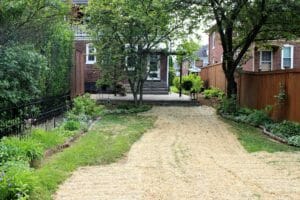
Phase 5 – CARE FOR THE LAWN. With all our machinery and crews on and off the project, we tend to rut up the lawn. Don’t be alarmed, however, it’s all part of the process. As a final step in caring for our clients, we make sure to smooth any ditches, repair any holes and plant new grass; Making sure to leave the project better looking then when we started.

Phase 6 – A LITTLE BIT OF R&R! One of the things we love most about we do, is our ability to provide our clients with a space that fulfills their needs and functions with their life.


Here are a few tips, that we utilize, when building big impact into a small space:
- Design your patio, walkway, or landscape beds with a purpose.
- This is how you will get the most bang for your buck and it ensures that every nook and cranny has a function.
- Create a focal point, like a fountain or install a pergola, and make that the centerpiece of your design.
- This will keep the space grounded without it being cramped.
- Install products that complement the style of your home and that you will never fall out of love with.
- This ensure the outdoor space you create will be used and loved, as if it were a natural extension of your home.
For every project we accomplish, each demolition plan and design is unique to the homeowners needs and the space limitations encountered. We pride ourselves on being able to adapt our process of execution without compromising our craftsmanship or customer service. I guess that’s what 32 years of industry experience will get you!
If you’re a homeowner that has a small space in need of a face-lift, we hope you are encouraged to embrace change, try something different, plan ahead, dream big, and build it according to your needs.
Just remember, a small space can have a mighty impact.